You add SePay to Codex with one codex mcp add command. Codex opens the browser for you to sign in to SePay and grant access.
Before you start
- A ChatGPT account or an OpenAI API key to sign in to Codex.
- A terminal: Terminal on macOS or Linux, PowerShell on Windows.
- Access to the AI Agent page on SePay, see requirements on SePay.
Connection steps
The steps follow Codex as of October 2026 and OpenAI's guide. If Codex changes, look for items with the same meaning or contact SePay for help.
Step 1: Install Codex
Skip this step if typing codex in a terminal already works. On macOS or Linux, install with:
$ curl -fsSL https://chatgpt.com/codex/install.sh | shOn Windows, install with this command in PowerShell:
$ powershell -ExecutionPolicy ByPass -c "irm https://chatgpt.com/codex/install.ps1 | iex"npm (npm install -g @openai/codex) or Homebrew (brew install --cask codex) also work. After installing, open a new terminal, run codex and choose Sign in with ChatGPT or another sign-in method Codex offers.
Step 2: Add SePay to Codex
Add SePay to Codex with this command. It applies to every folder on the computer; run it once per computer. The command is also on SePay's Tạo kết nối (Create connection) page, under the Codex card.
$ codex mcp add sepay --url https://my.sepay.vn/mcpCodex prints Detected OAuth support. Starting OAuth flow… and opens the SePay access screen in the browser. Leave that terminal open until Step 3 is done. If the browser does not open, copy the link Codex prints and paste it into the browser.
If you closed the terminal or the browser before granting access, sign in again with:
$ codex mcp login sepayGrant Codex access on SePay
Step 3: Grant access
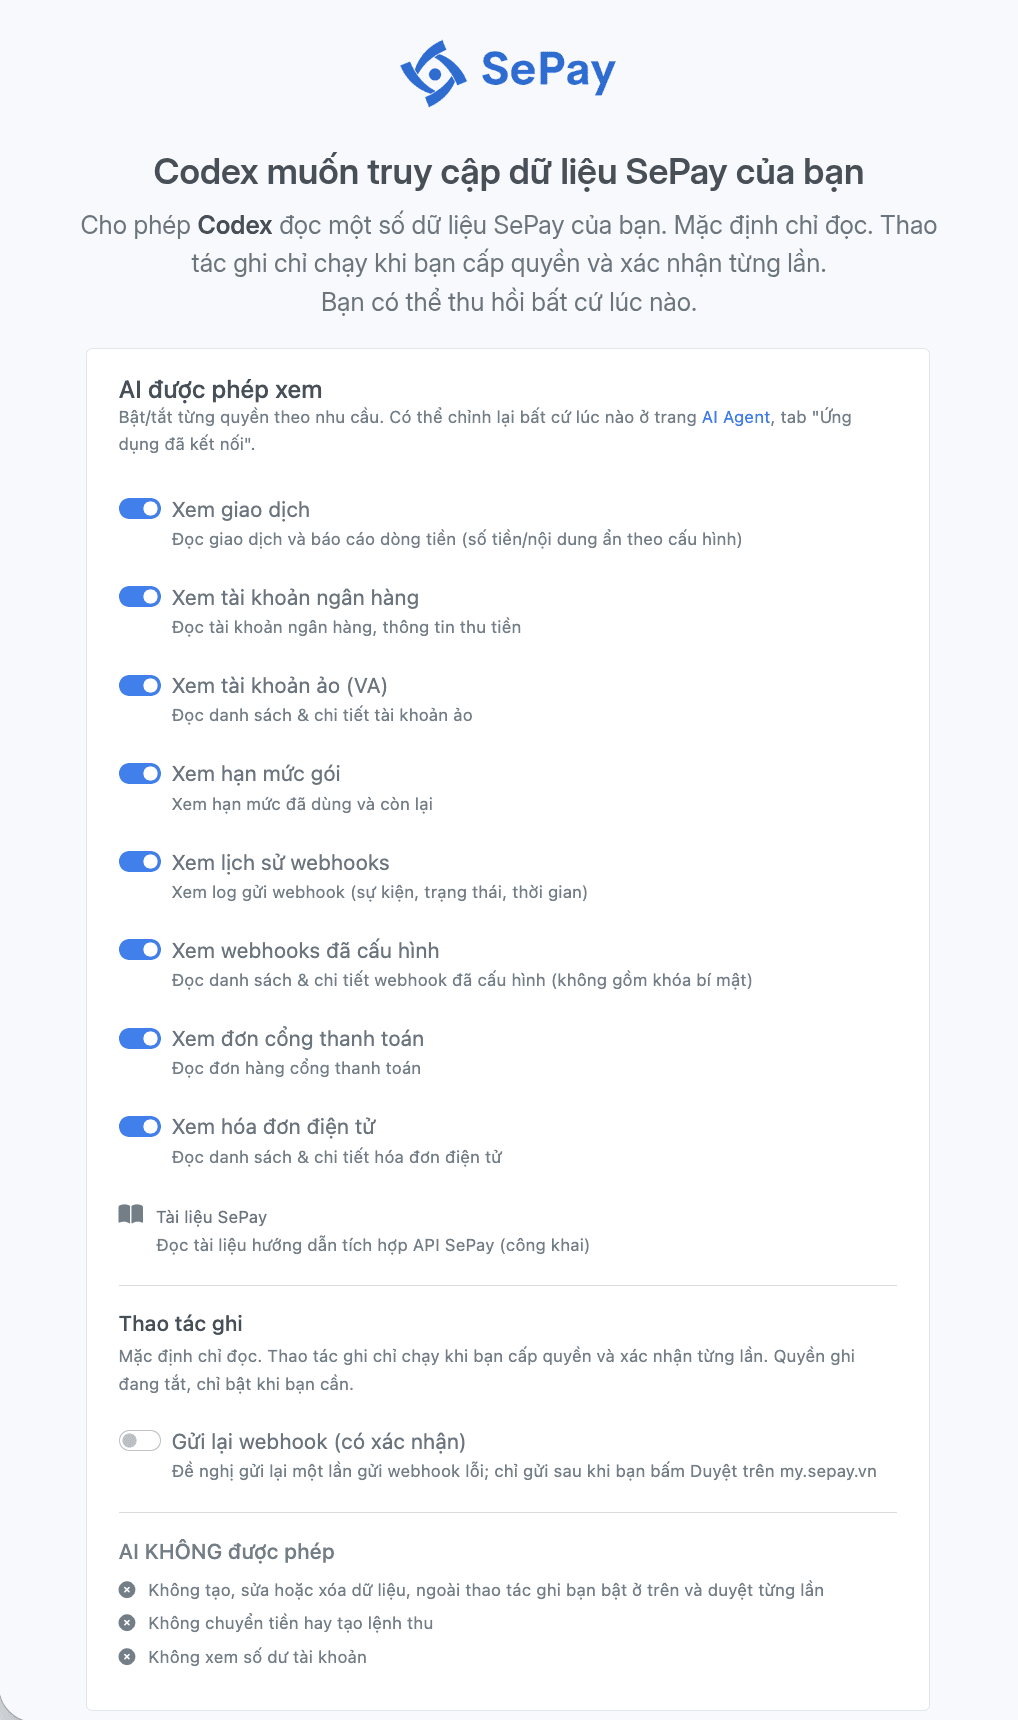
On the Codex muốn truy cập dữ liệu SePay của bạn (Codex wants to access your SePay data) screen:
- Turn each data group on or off under AI được phép xem (AI may view).
- If needed, open Ẩn bớt thông tin cho ứng dụng này (Hide more information for this app).
- Select Đồng ý cấp quyền (Grant access).
Each data group and hide option is explained in SePay MCP permissions and security.
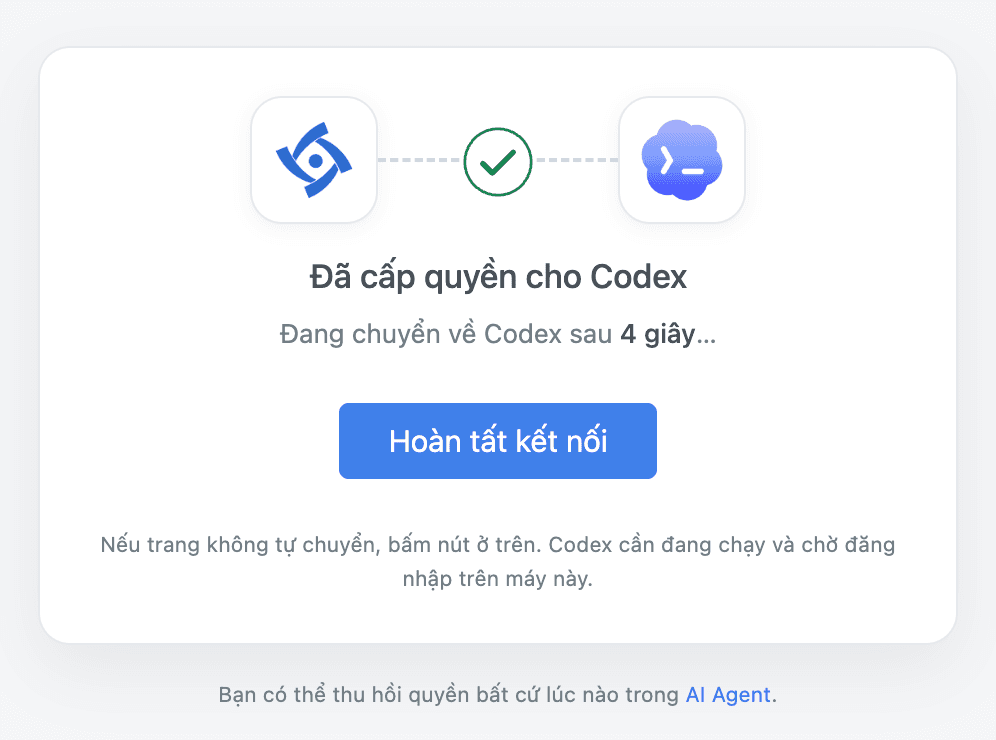
SePay shows the Đã cấp quyền cho Codex (Access granted to Codex) page and returns to Codex after a few seconds. If it does not, select Hoàn tất kết nối (Finish connecting). When the terminal prints a line starting with Successfully logged in, the connection is done.
Ask Codex about your SePay data
Run codex and ask, for example "List my 5 most recent SePay transactions". The first time, Codex may ask whether it may call a SePay tool: approve to continue. When Codex calls a sepay tool and returns a list of transactions, the connection works. Here sepay is the name you gave SePay MCP in the Step 2 command, not the SePay CLI.
Look up SePay integration docs
Codex can read the docs on developer.sepay.vn through SePay MCP, even before you grant access. When you ask an integration question, it reads the relevant docs page and answers with a link to it. Open the link to check before using the code. For example:
- "Write a Node.js endpoint that receives SePay webhooks and skips duplicate transactions."
- "How does the SePay payment gateway send IPN, and what must I return?"
- ...
Disconnect Codex
Remove SePay from Codex with:
$ codex mcp remove sepayThis does not revoke the connection on SePay. To revoke it, go to the AI Agent page, see Manage connections. If you revoke it on SePay but keep SePay in Codex, run codex mcp login sepay to grant access again when you need it.
Common errors
Common SePay MCP errors are in Common errors when connecting SePay MCP.
Next steps
- See sample questions for each kind of data in SePay MCP tools.
- Install SePay Skills so Codex knows SePay's integration flows and security notes when writing integration code.