You add SePay to ChatGPT as a plugin: copy the server address and Client ID from SePay to ChatGPT, then sign in to SePay to grant access.
Before you start
- A ChatGPT account. Add SePay on chatgpt.com in a desktop browser; the ChatGPT mobile app cannot add it.
- The account can add plugins: open chatgpt.com/plugins and select Add at the top right; if Add custom MCP server is in the menu, it can. If there is none, see Common errors.
- Access to the AI Agent page on SePay, see requirements on SePay.
Connection steps
The steps follow the ChatGPT interface as of October 2026 and OpenAI's guide. If the ChatGPT interface changes, look for items with the same meaning or contact SePay for help.
Step 1: Get the server address and Client ID on SePay
- Sign in to my.sepay.vn.
- In the left menu, under Tích hợp & Thông báo, select AI Agent.
- Select Tạo kết nối (Create connection) at the top right.
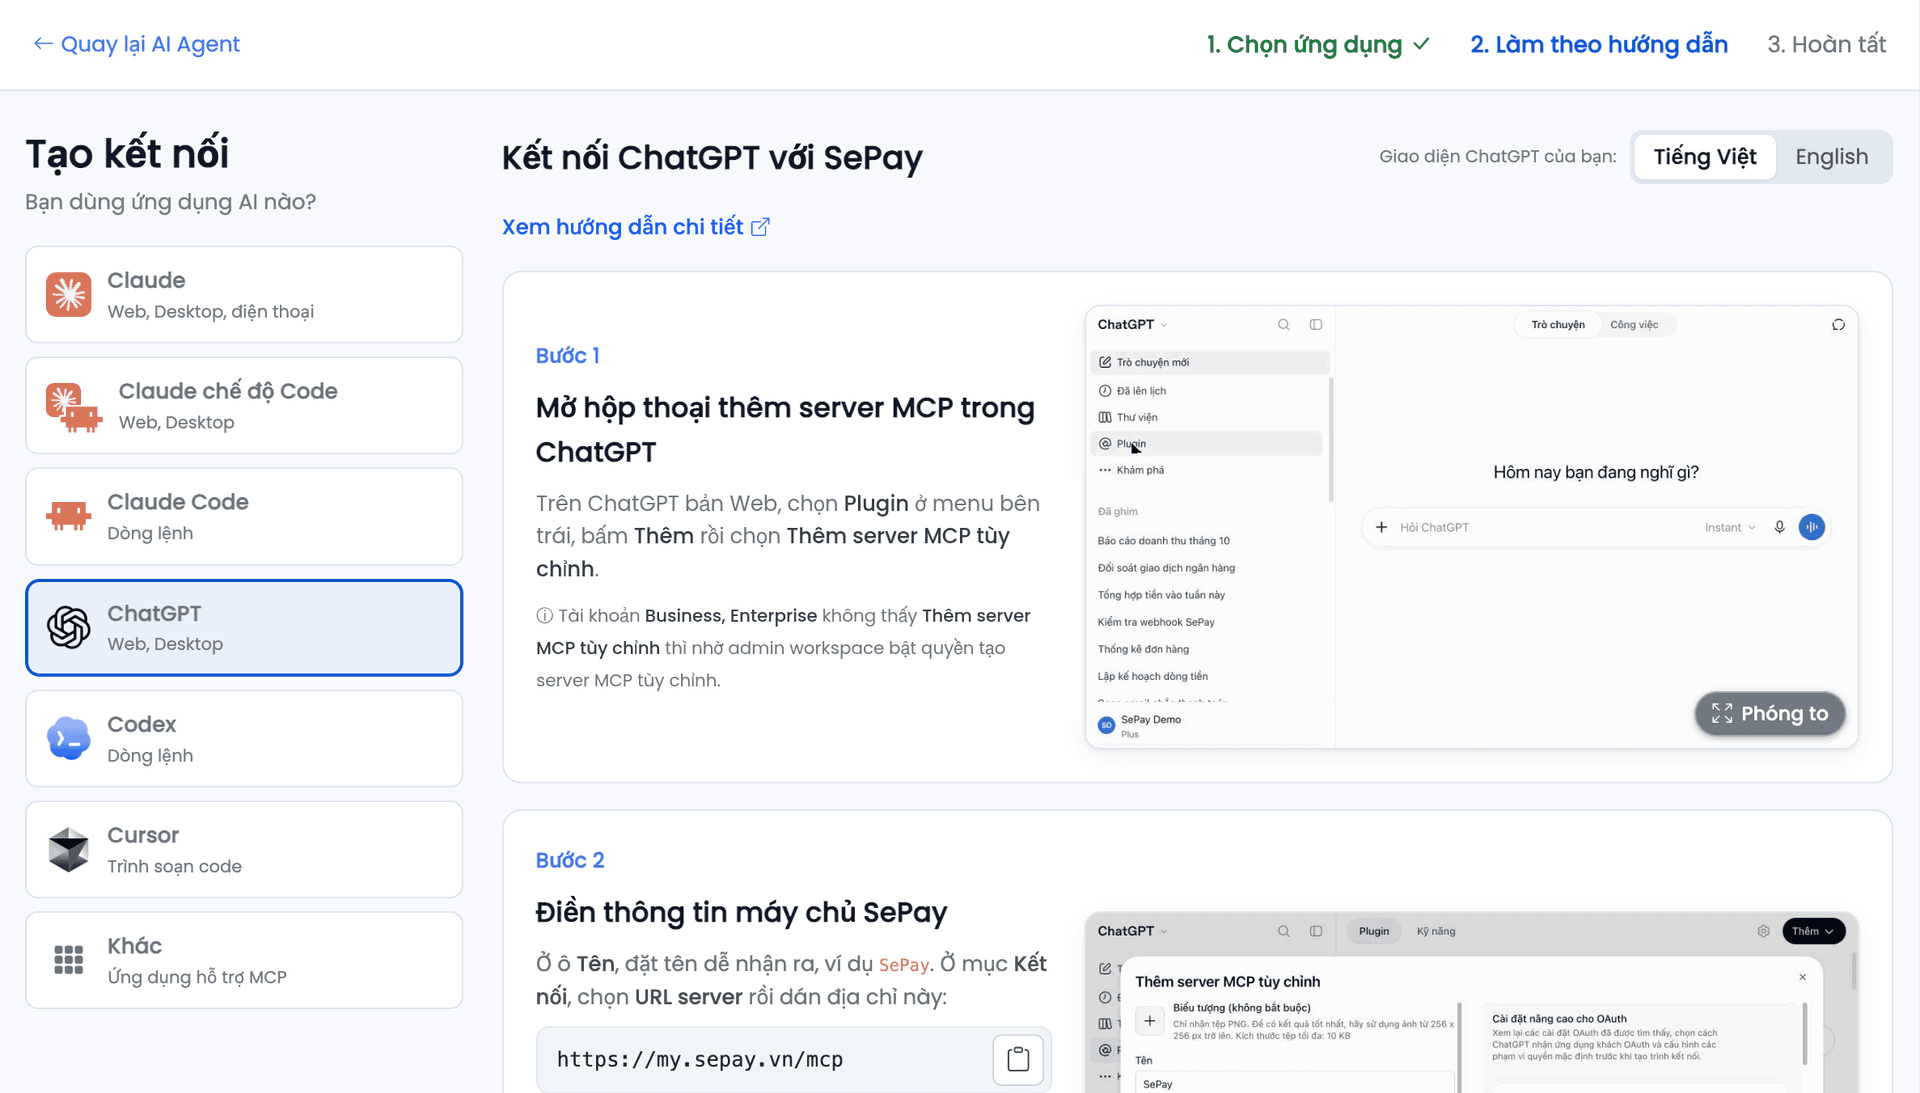
On the Tạo kết nối (Create connection) page, under Bạn dùng ứng dụng AI nào? (Which AI app do you use?), choose ChatGPT:
- MCP Server URL (
https://my.sepay.vn/mcp): paste it into ChatGPT in Step 3. - OAuth Client ID (
sepay-chatgpt): paste it into ChatGPT in Step 3.
Each field has a copy button. Keep this page open next to ChatGPT.
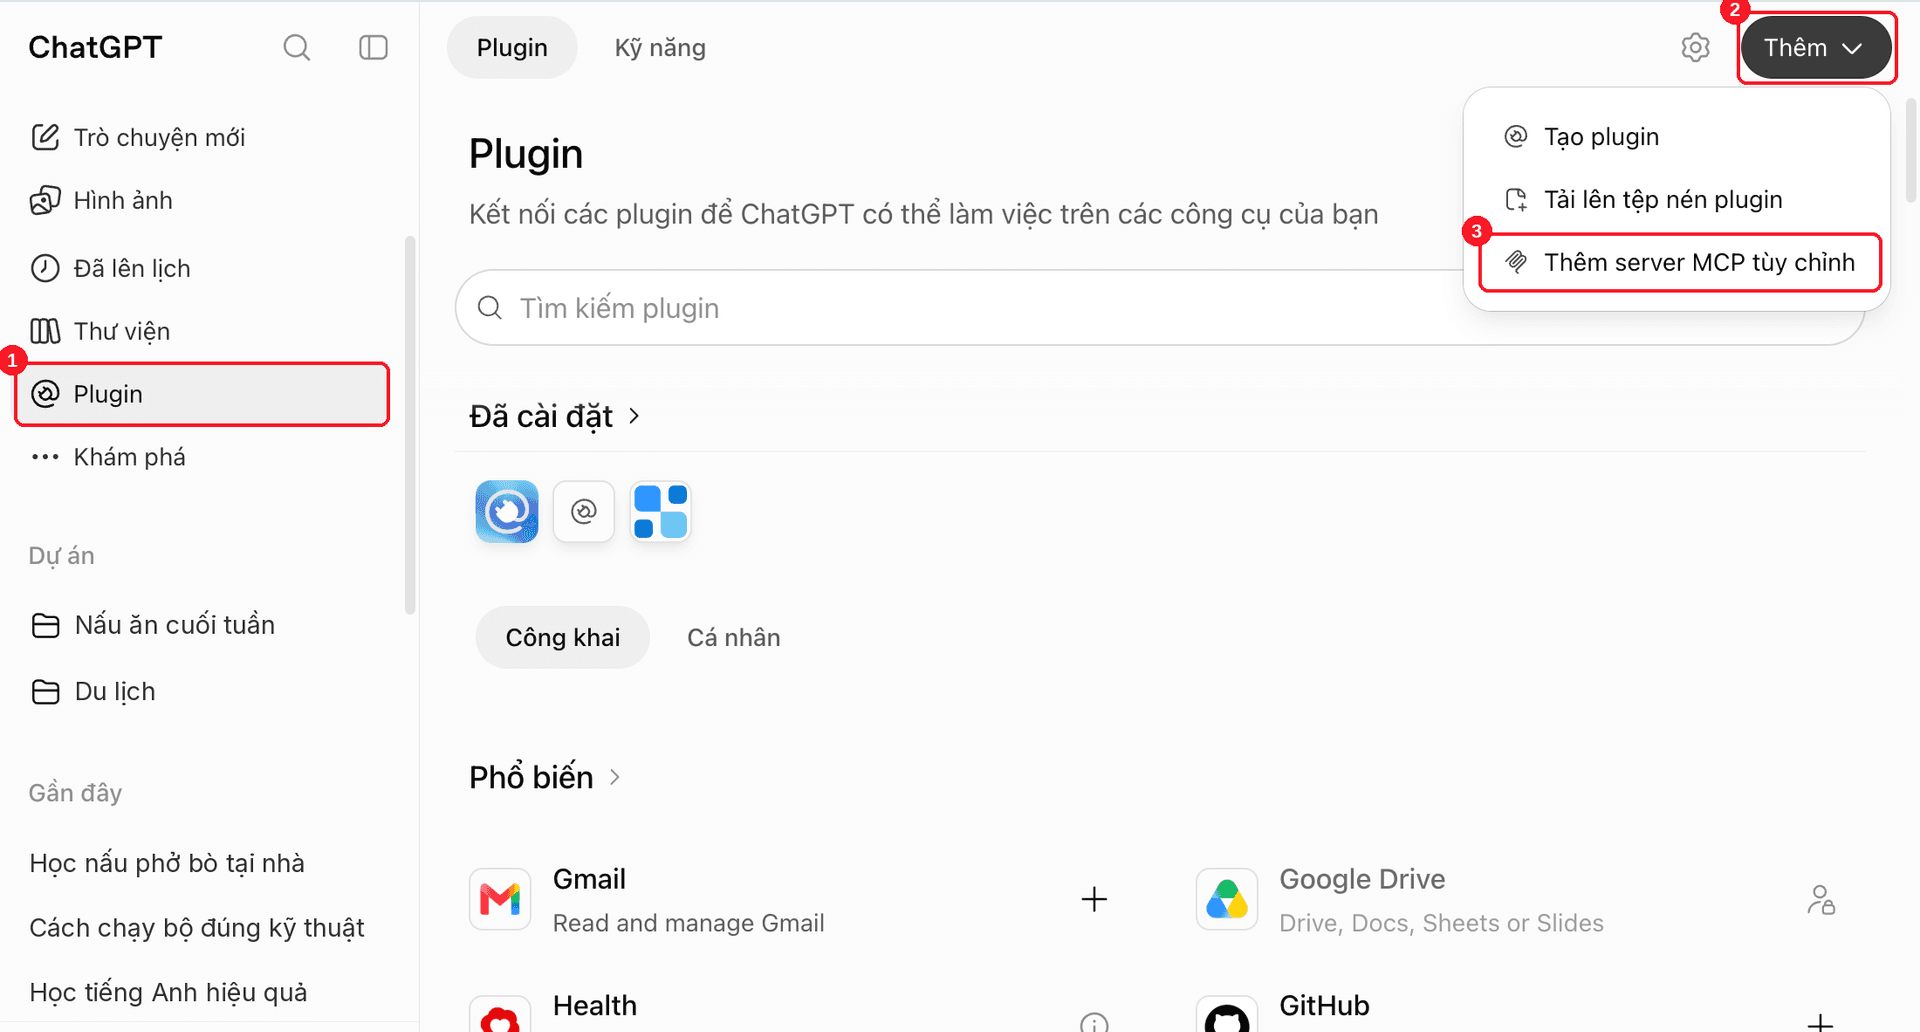
Step 2: Open the add MCP server dialog in ChatGPT
- On chatgpt.com, select Plugins in the left menu.
- Select Add at the top right.
- Select Add custom MCP server.
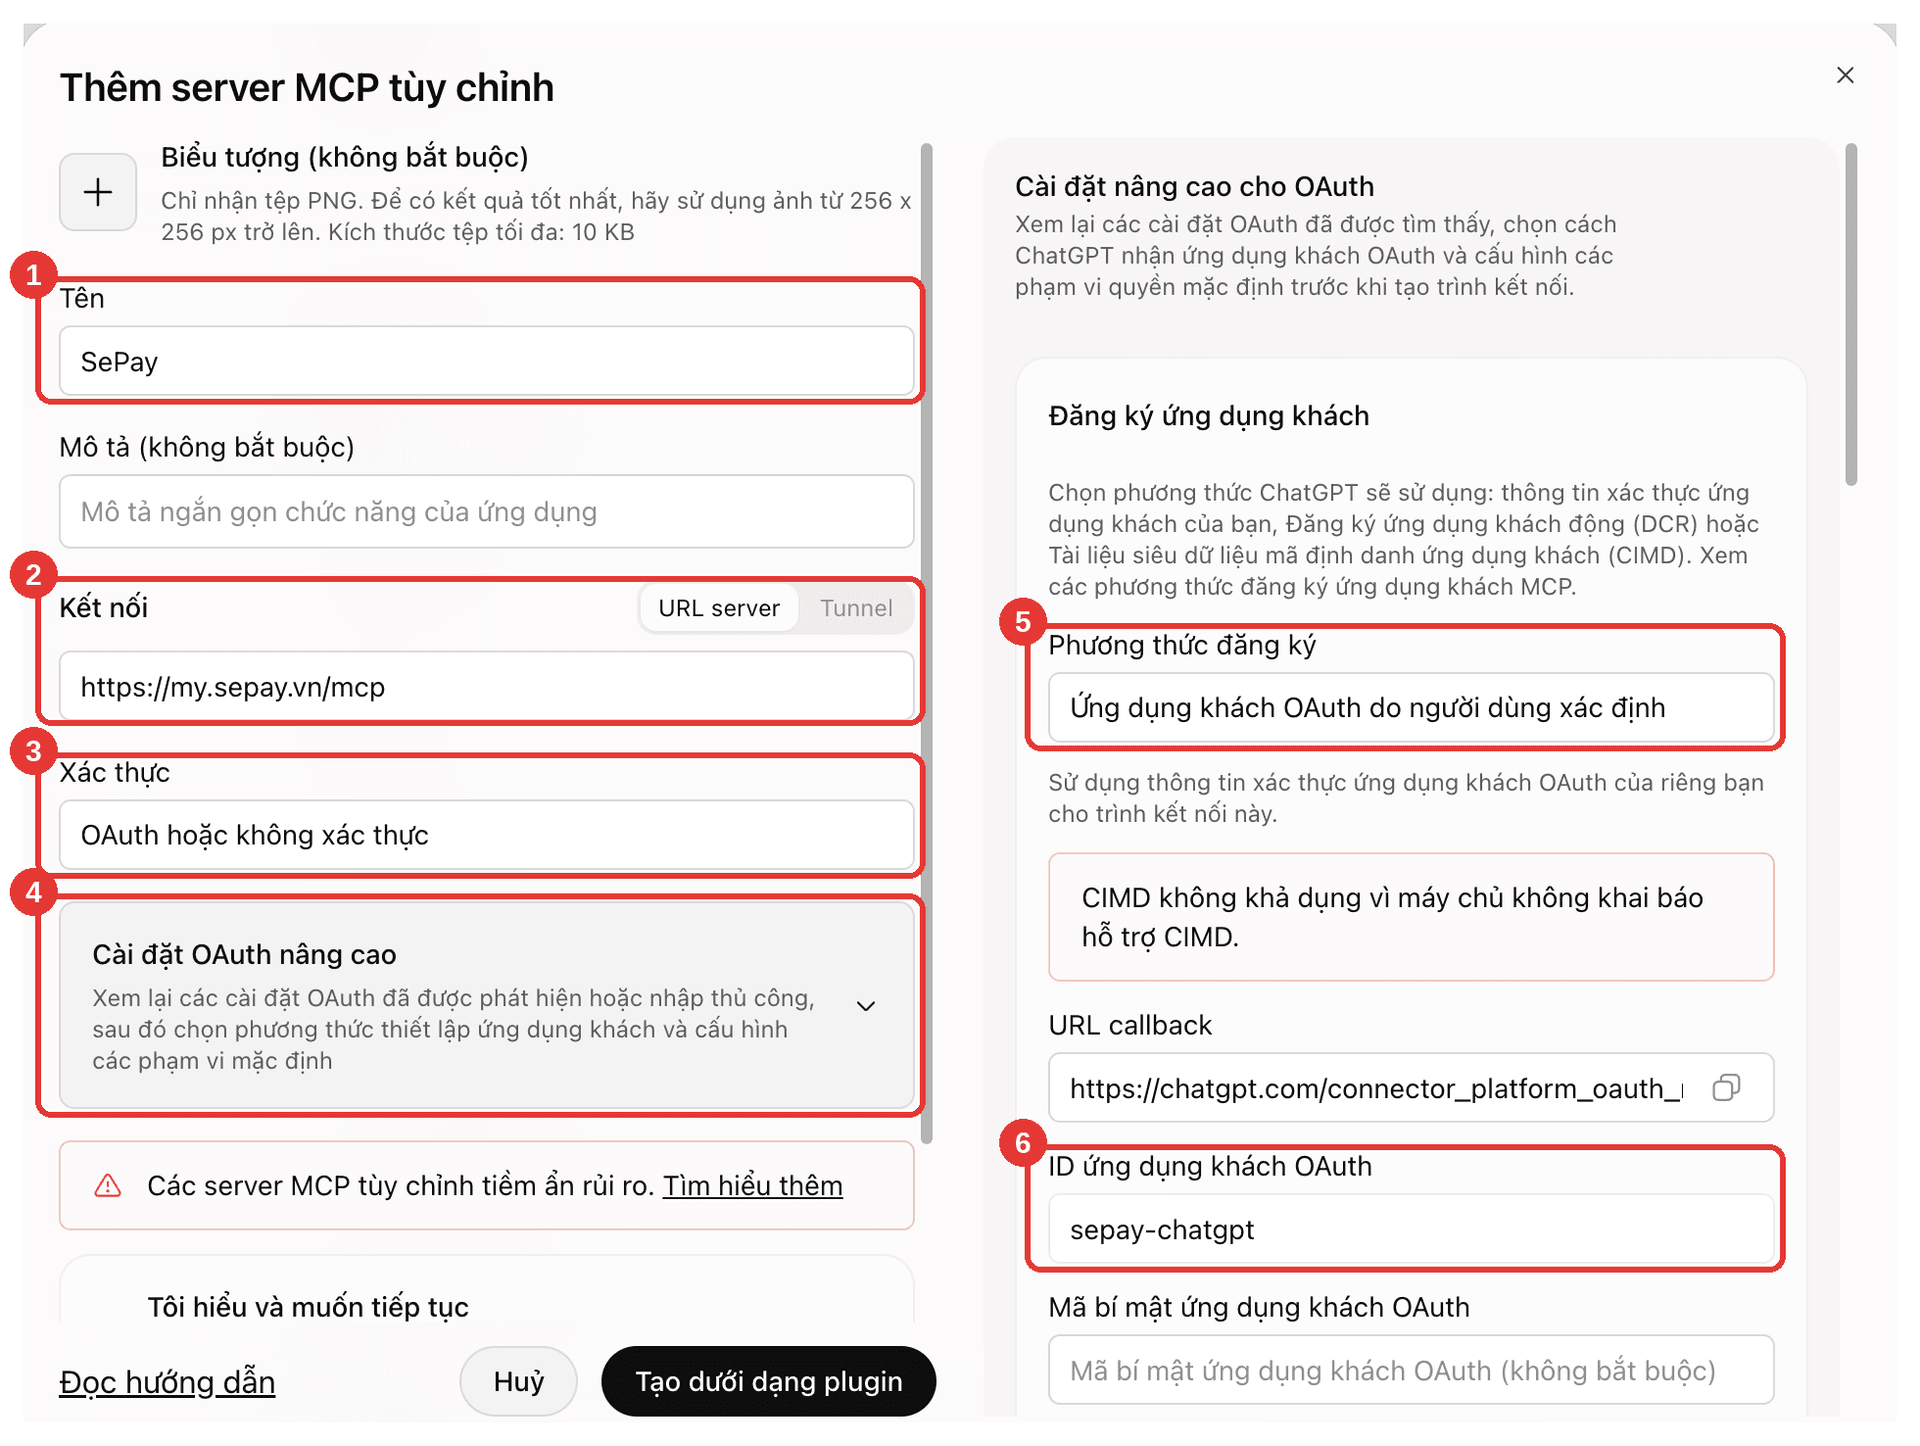
Step 3: Enter the SePay server details
In the Add custom MCP server dialog:
- In Name, enter a name you will recognize, for example
SePay. It shows again on the dialog in Step 5. - Under Connection, select Server URL and paste
https://my.sepay.vn/mcp. - Under Authentication, select OAuth or no authentication. If ChatGPT shows an error when creating it, see Common errors.
- Open Advanced OAuth settings. Its settings appear on the right side of the dialog.
- Under Registration method, select User-Defined OAuth Client.
- Paste the Client ID from SePay (
sepay-chatgpt) into OAuth client ID. Leave OAuth client secret empty. Skip the Callback URL field.
Step 4: Confirm and create the plugin
Still in the same dialog:
- Read the risk warning and check I understand and want to continue.
- Select Create as a plugin.
Grant ChatGPT access on SePay
Step 5: Sign in to SePay and grant access
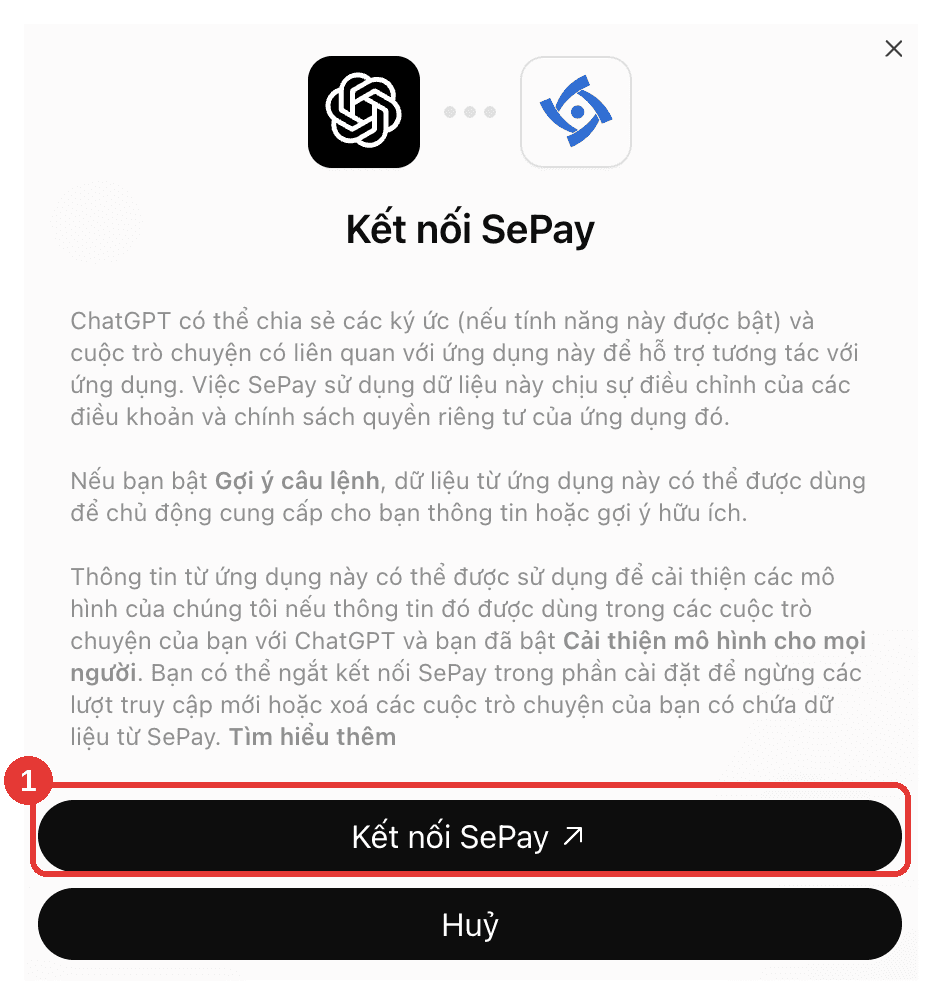
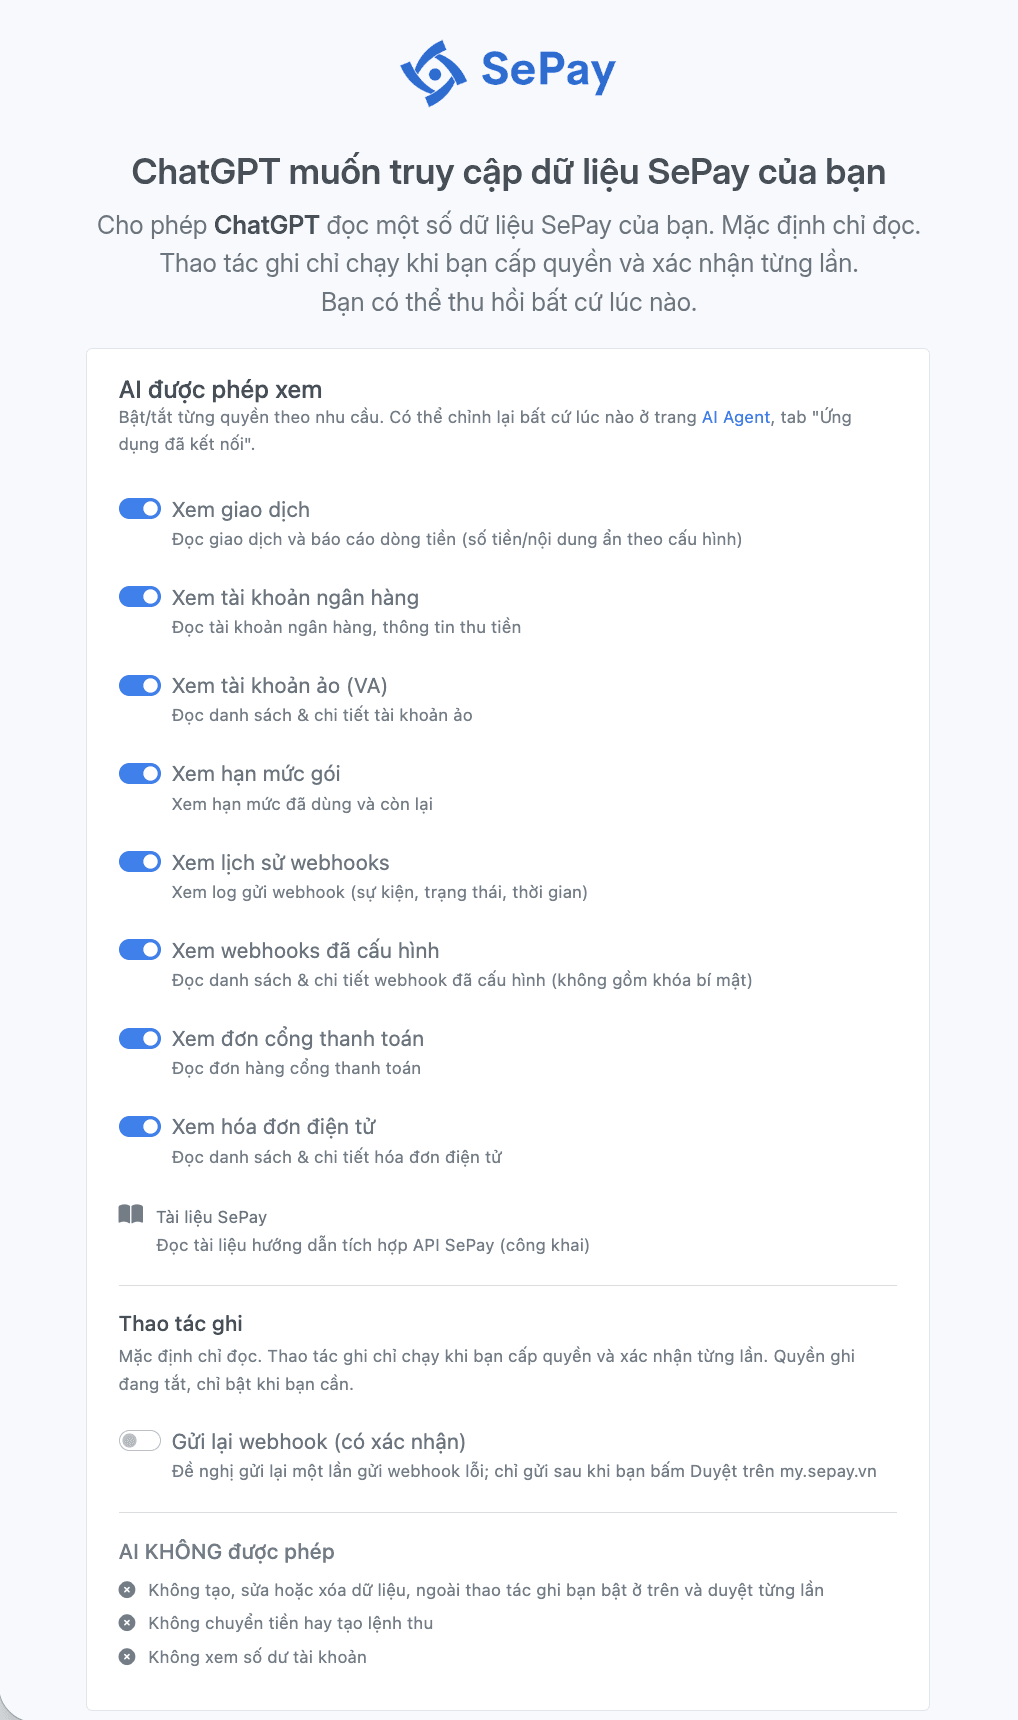
After you create it, ChatGPT shows a dialog to connect SePay (named as in Step 3). Select its connect button to open the SePay access screen. If you are not signed in to my.sepay.vn, SePay asks you to sign in first.
On the ChatGPT muốn truy cập dữ liệu SePay của bạn (ChatGPT wants to access your SePay data) screen:
- Turn each data group on or off under AI được phép xem (AI may view).
- If needed, open Ẩn bớt thông tin cho ứng dụng này (Hide more information for this app).
- Select Đồng ý cấp quyền (Grant access).
Each data group and hide option is explained in SePay MCP permissions and security.
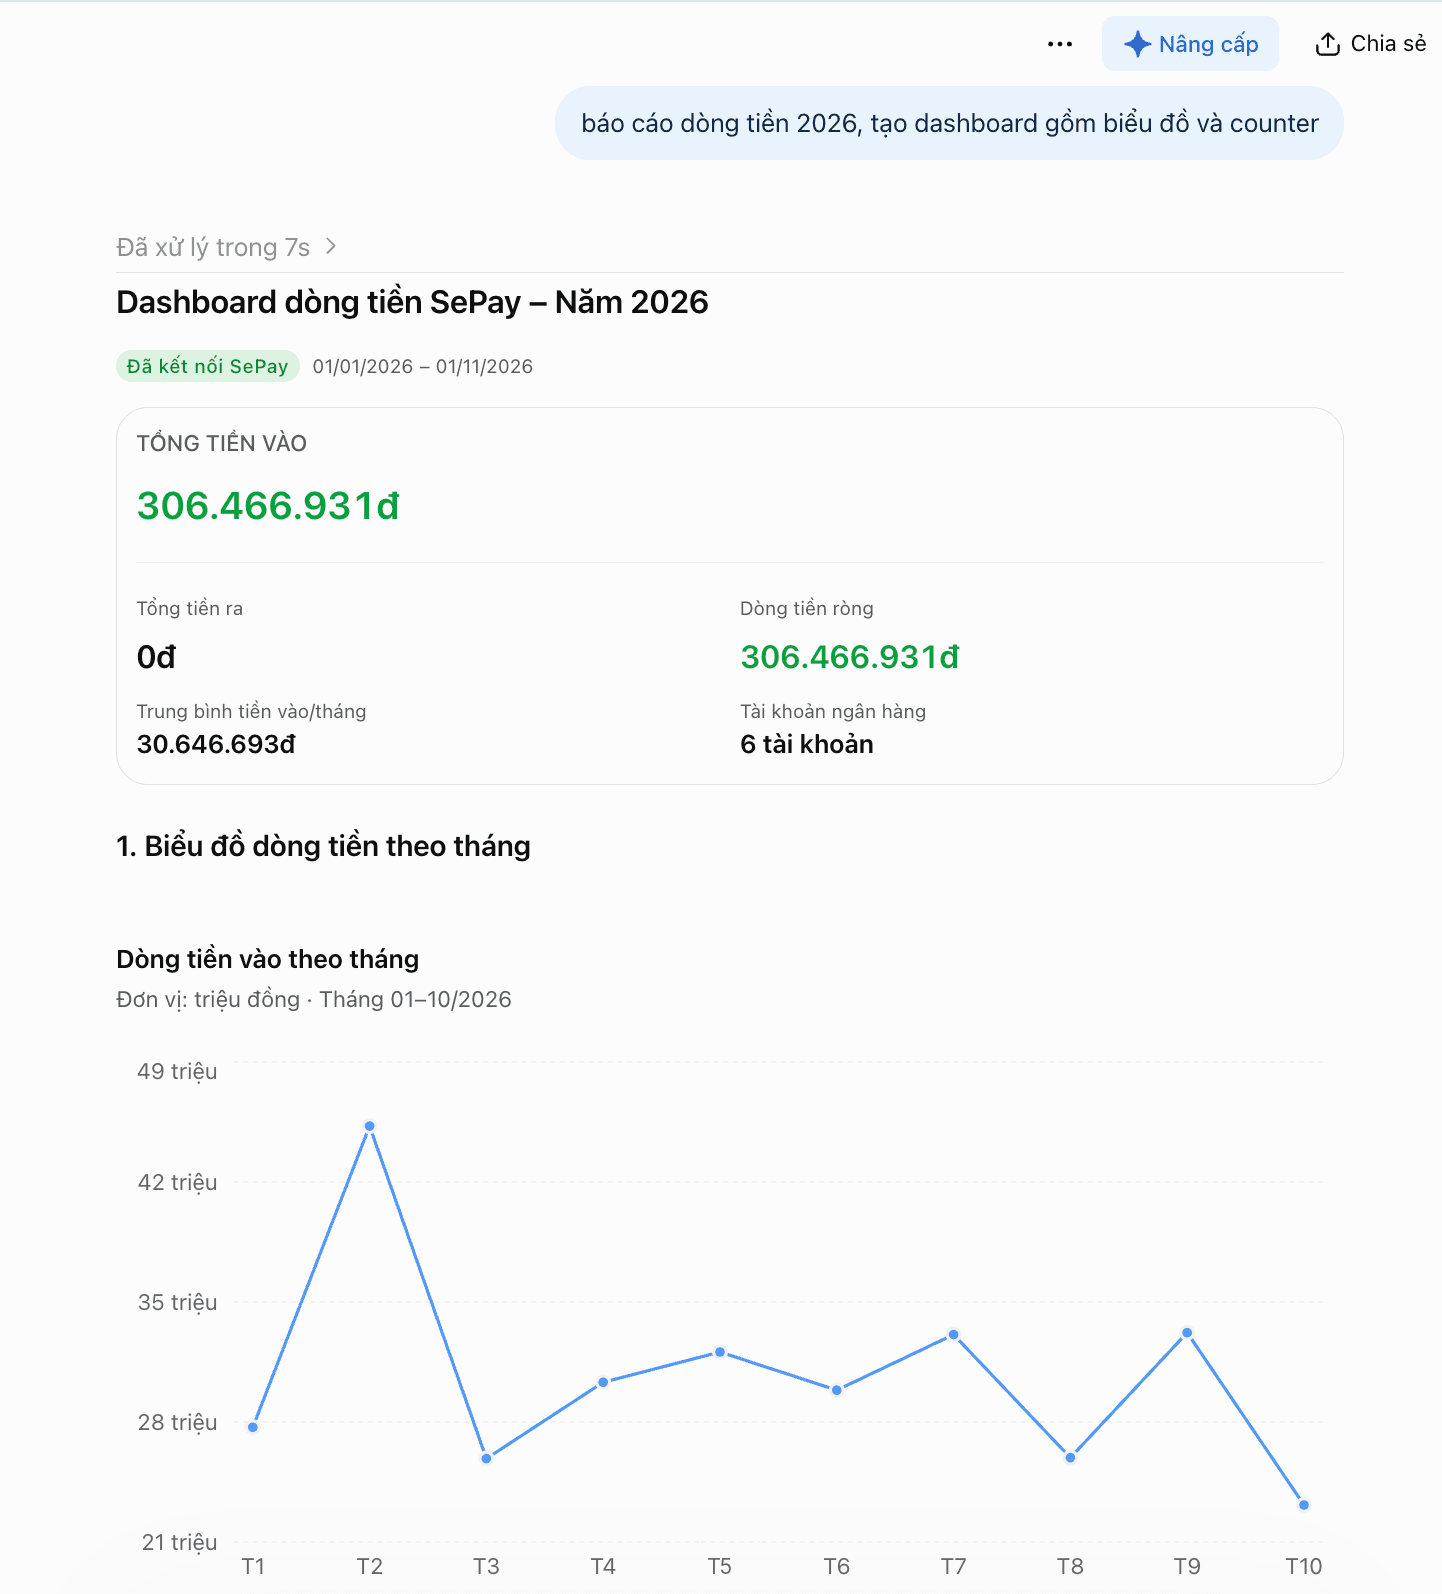
Ask ChatGPT about your SePay data
Ask ChatGPT, for example "Cash flow report for 2026, build a dashboard with a monthly chart". ChatGPT may ask you to confirm before it uses a SePay tool; confirm to continue. When ChatGPT returns figures from SePay, such as total money in and money in per month, the connection works.
Disconnect ChatGPT
- In ChatGPT: remove SePay from Plugins.
- On SePay: revoke the ChatGPT connection on the AI Agent page, see Manage connections.
Common errors
Common SePay MCP errors are in Common errors when connecting SePay MCP.
Next steps
- Use SePay MCP in the terminal with Codex, or in a code editor with Cursor.
- Add SePay Skills to ChatGPT so ChatGPT guides your SePay integration from the docs.
- See sample questions for each kind of data in SePay MCP tools.