How to Register an Application
Before starting OAuth 2.0 integration, you need to register your application on SePay to obtain client_id and client_secret. These are required credentials to perform OAuth 2.0 authentication.
Currently, you cannot create applications by yourself. You must contact SePay for approval and application creation support on your account.
The application registration steps are as follows:
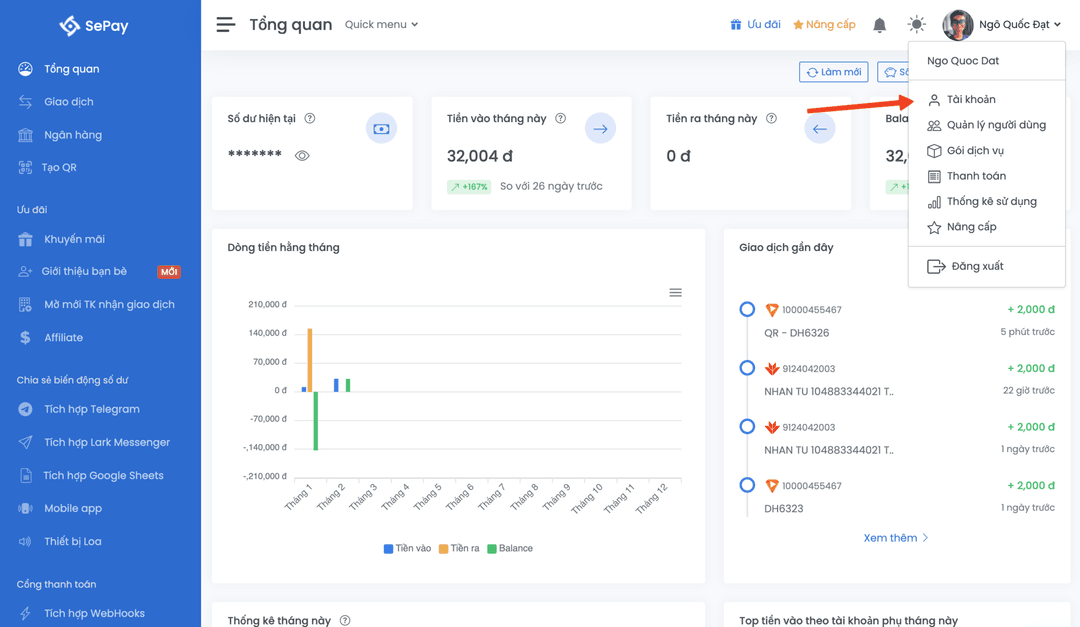
- Step 1: Log in to your SePay account.
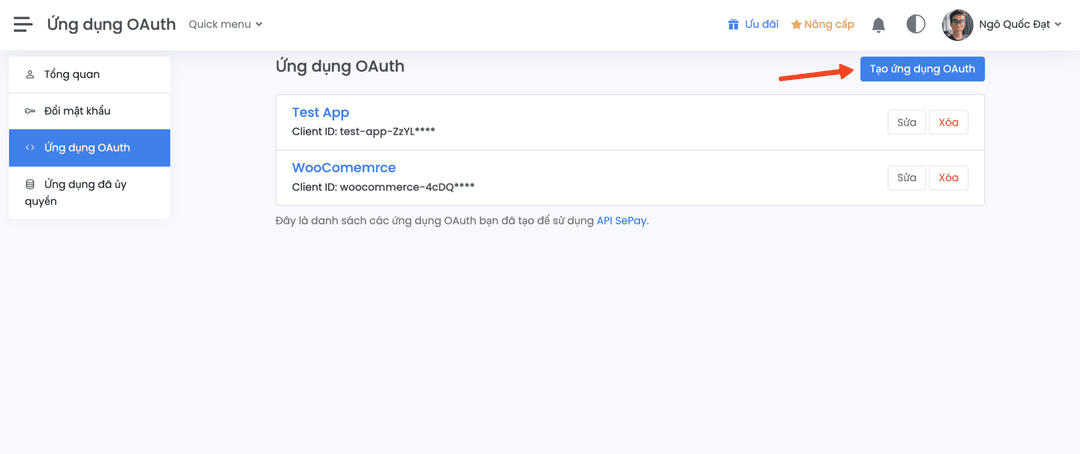
- Step 2: Navigate to Account menu → OAuth Applications.
- Step 3: Click on Create new application button
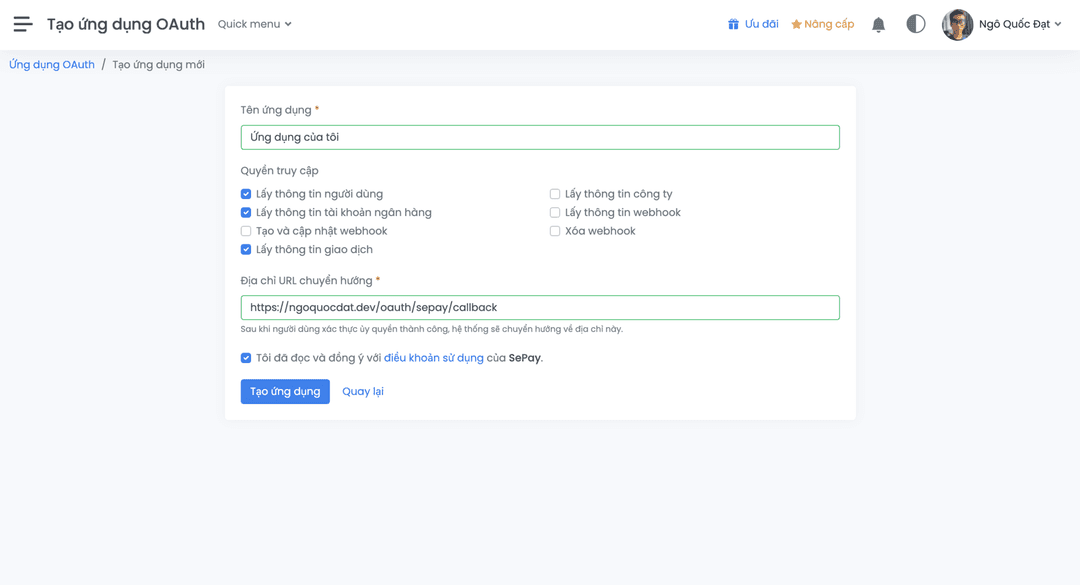
Application Information
When creating a new application, you need to provide the following information:
| Information | Description |
|---|---|
| Application Name | Display name of the application. Users will see this name when prompted to grant permissions. |
| Required Scopes | Permissions that the application requires. Only select permissions necessary for your application. |
| Redirect URL | The URL that SePay will redirect users to after they approve or deny the permission request. |
Scopes
When registering an application, you need to select the scopes that your application needs to access.
Available scopes include:
| Scope | Description | Permissions |
|---|---|---|
bank-account:read | Access bank account information | View account list, balance, details of each account |
transaction:read | Access transaction information | View transaction history, transaction details, count transactions |
webhook:read | Access webhook information | View webhook list, details of each webhook |
webhook:write | Manage webhooks | Create new, update webhooks |
webhook:delete | Delete webhooks | Delete a webhook |
profile | Access user information | View personal user information |
company | Access company information | View detailed company information |
Only request scopes that are truly necessary for your application. Requesting too many unnecessary permissions will reduce the acceptance rate of users granting permissions.
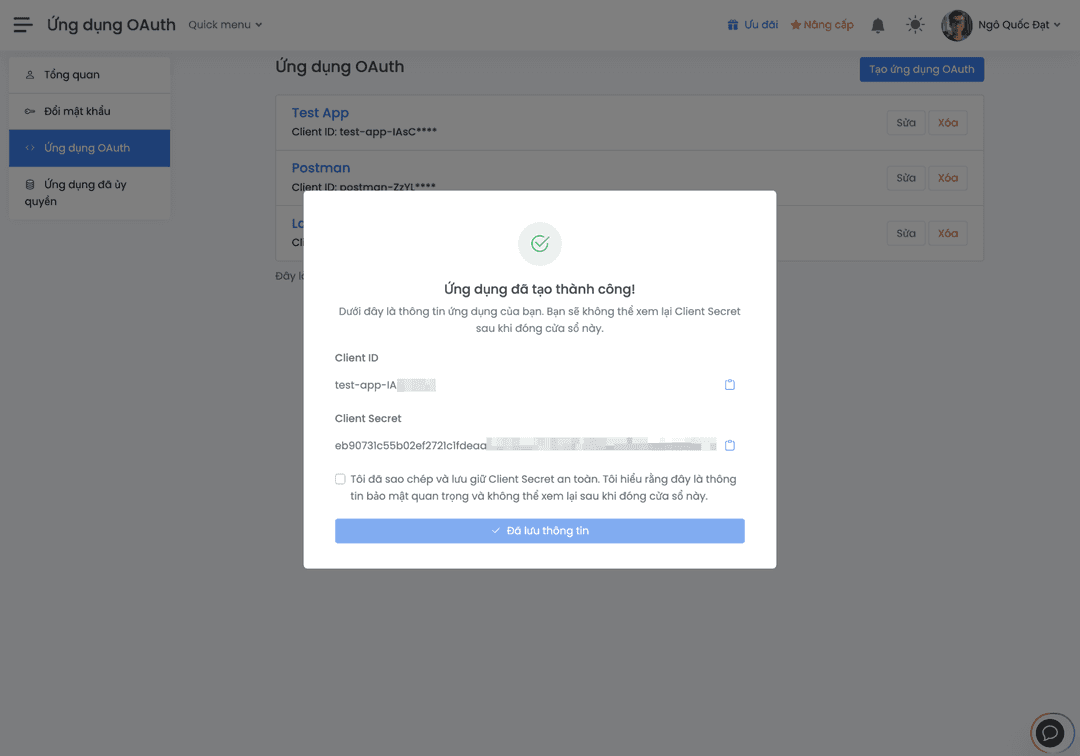
Client ID and Client Secret
After successful registration, the system will provide you with:
- Client ID: Public identifier of the application
- Client Secret: Secret key used to authenticate the application
Client Secret is sensitive information and must be kept secure. Do not share or expose Client Secret in public source code or client-side applications.
Client ID and Client Secret will be displayed as shown below:
Application Management
After creating an application, you can manage registered applications at Account menu → OAuth Applications to manage created OAuth applications:
- Edit application information: Update name, redirect URL
- Update scopes: Change required permissions
- Delete application: Completely delete the application and revoke all issued tokens
Next Step
After successfully registering an application and obtaining Client ID and Client Secret, you are ready to implement OAuth 2.0 authentication flow. Continue to the Authentication Flow page to learn the next steps.