Authentication Flow Overview
SePay implements OAuth 2.0 using the Authorization Code flow, one of the most popular and secure OAuth 2.0 authentication flows. This flow is suitable for most web applications and server-side applications.
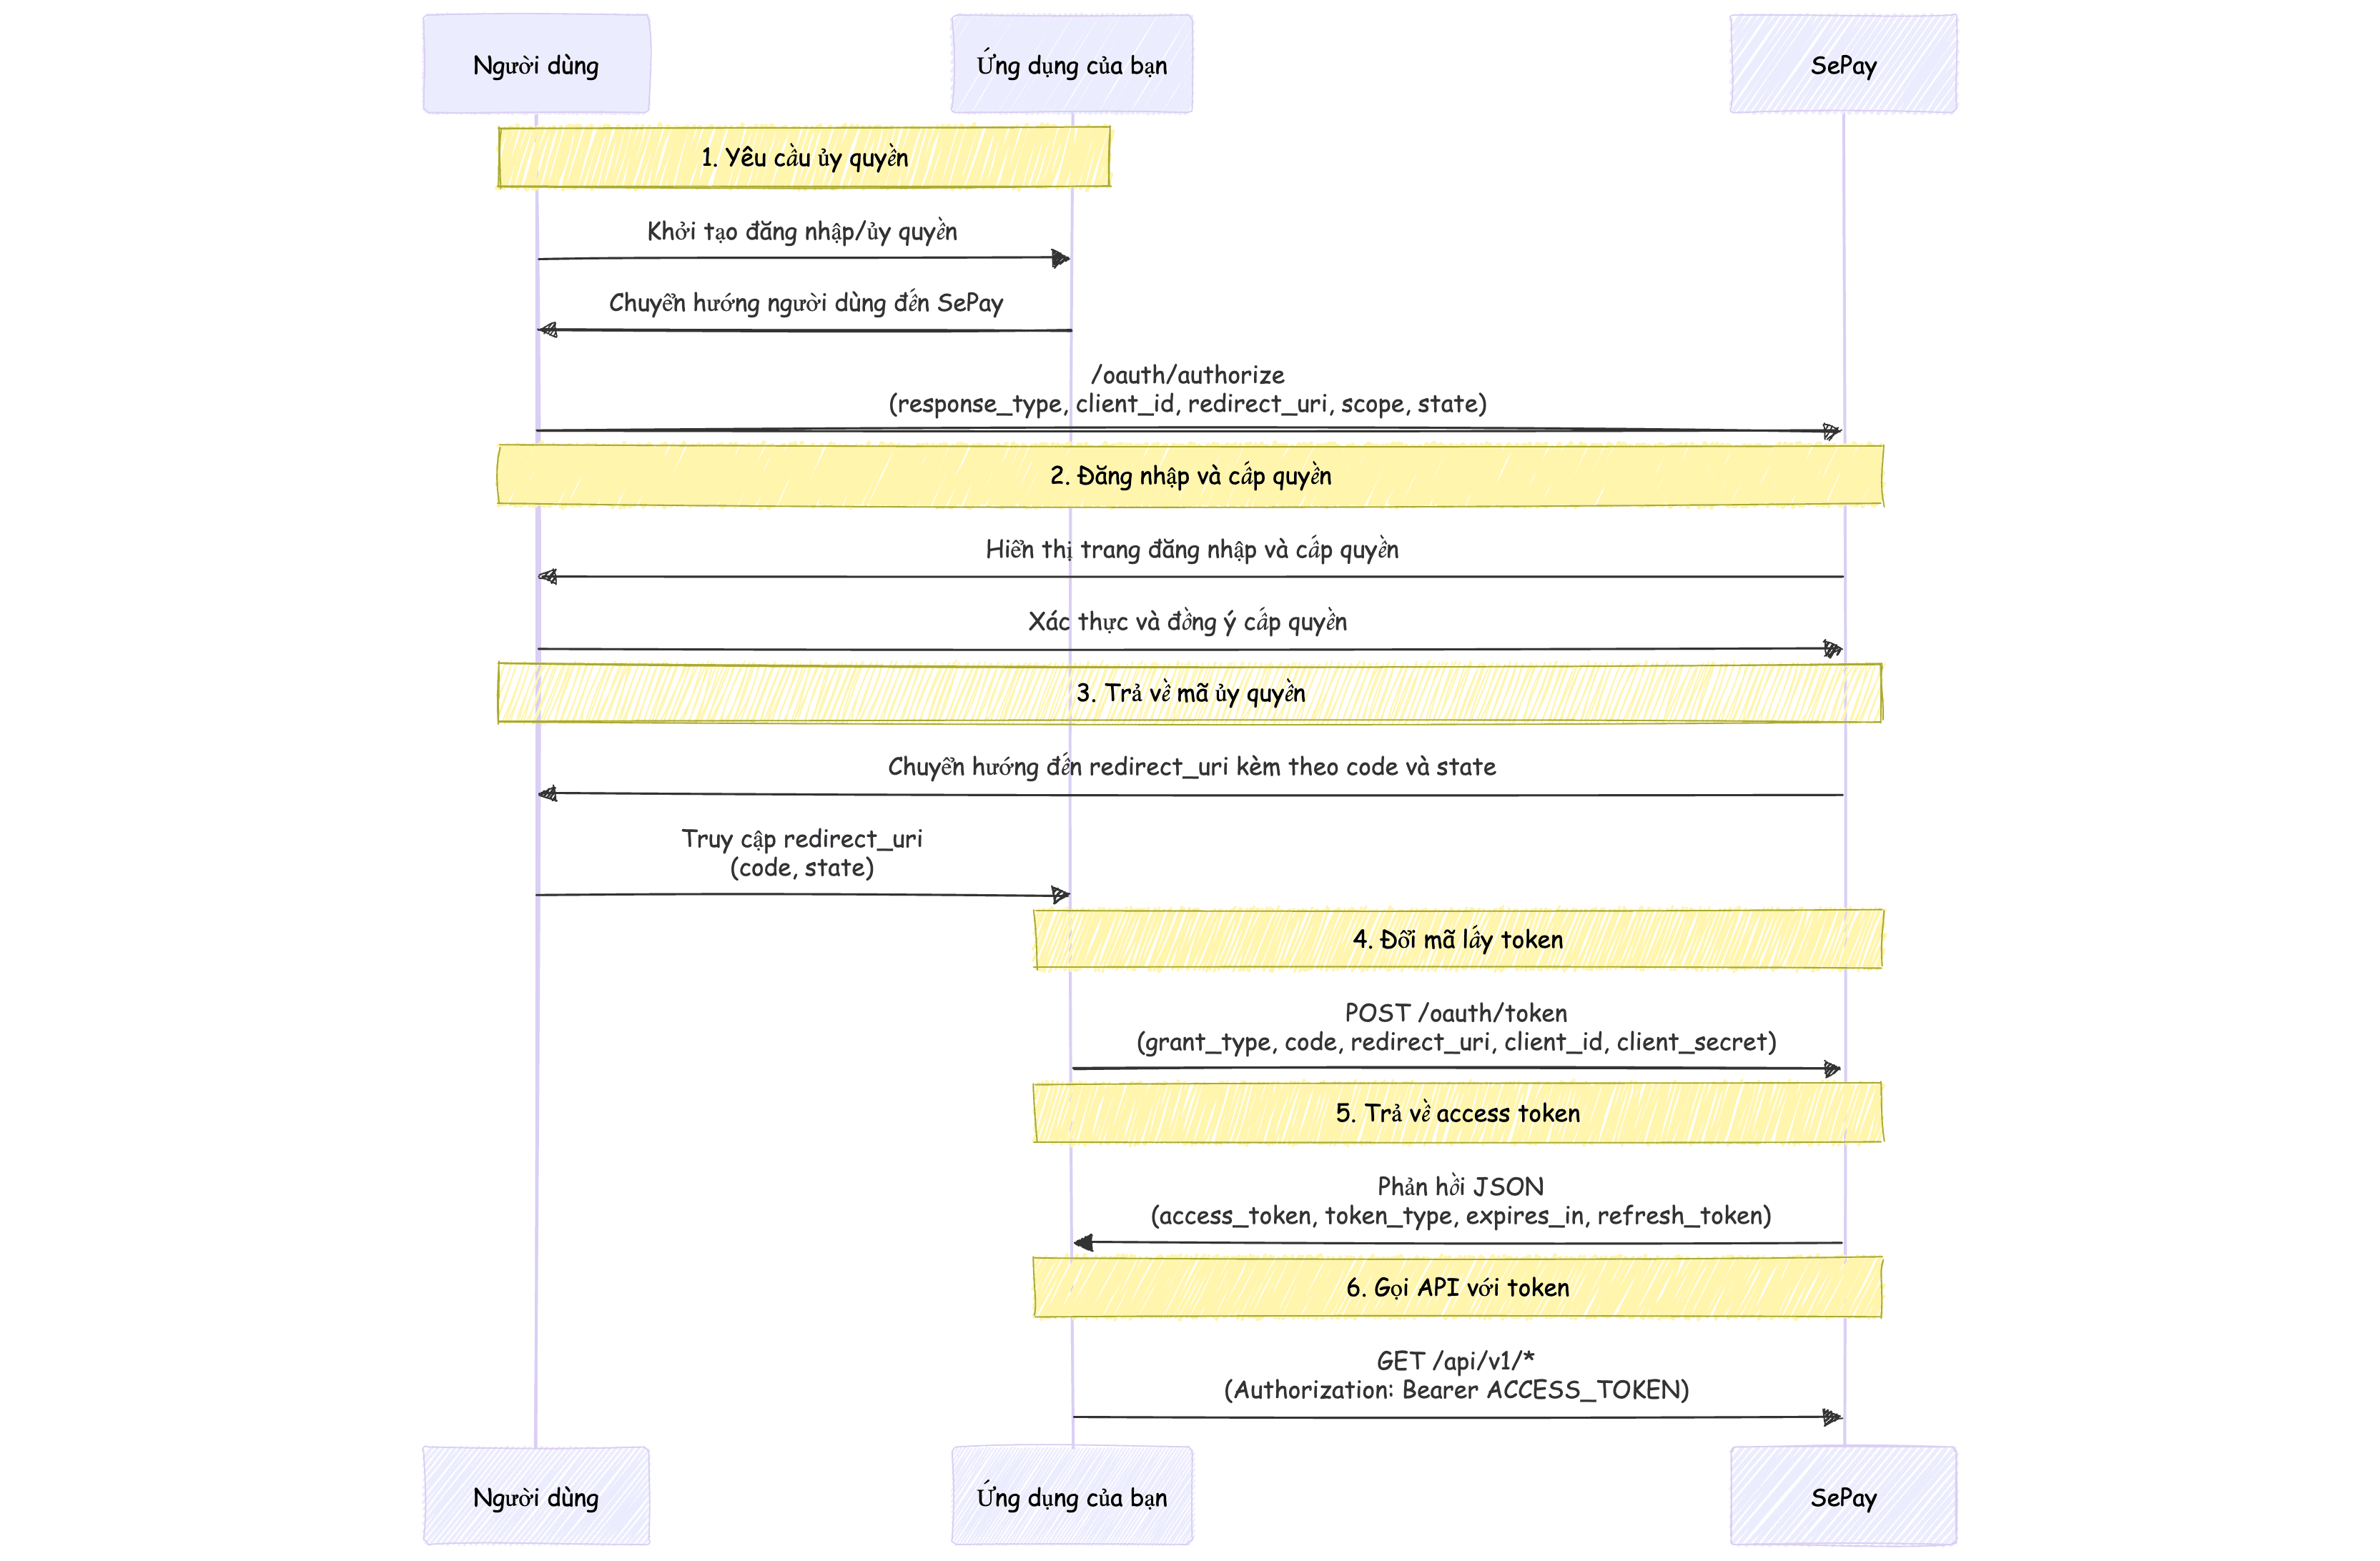
The OAuth 2.0 authentication flow in SePay includes the following steps:
- Step 1: Application requests authorization from user by redirecting to SePay authorization URL
- Step 2: User logs into SePay and agrees to grant permissions to the application
- Step 3: SePay redirects to application's redirect URI with an authorization code
- Step 4: Application exchanges authorization code for access token from SePay
- Step 5: Application uses access token to call SePay APIs
Step 1: Request Authorization
To start the authentication process, redirect the user to SePay's authorization URL:
https://my.sepay.vn/oauth/authorize?response_type=code&client_id=YOUR_CLIENT_ID&redirect_uri=YOUR_REDIRECT_URI&scope=bank-account:read transaction:read&state=RANDOM_STATE_VALUE
URL parameter explanation:
The state parameter should be used to protect against CSRF attacks. Generate a random value, store it in session, and verify when receiving callback.
Step 2: User Grants Permission
After redirecting to the authorization URL, the user will see the SePay login screen (if not logged in) and then the permission confirmation screen:
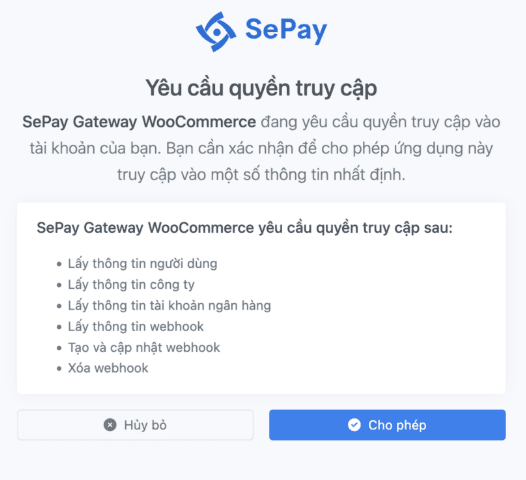
This screen displays:
- Name of the application requesting access
- Permissions requested by the application
- Buttons to approve or deny permission
Step 3: Receive Authorization Code
After the user grants permission, SePay will redirect to your redirect_uri with an authorization code:
https://your-app.com/callback?code=AUTHORIZATION_CODE&state=RANDOM_STATE_VALUE
Your application needs to:
- Verify the
stateparameter matches the previously sent value - Extract the authorization code from the code parameter
The authorization code is only valid for a short time (usually 5 minutes) and can only be used once. You need to exchange it for an access token immediately after receiving it.
Step 4: Exchange Authorization Code for Access Token
After receiving the authorization code, you need to exchange it for an access token by sending a POST request to SePay's token endpoint:
https://my.sepay.vn/oauth/tokenContent-Type: application/x-www-form-urlencoded
grant_type=authorization_code
code=AUTHORIZATION_CODE
redirect_uri=YOUR_REDIRECT_URI
client_id=YOUR_CLIENT_ID
client_secret=YOUR_CLIENT_SECRETParameter explanation:
curl -X POST "https://my.sepay.vn/oauth/token" \-H "Content-Type: application/x-www-form-urlencoded" \-d "grant_type=authorization_code" \-d "code=AUTHORIZATION_CODE" \-d "redirect_uri=YOUR_REDIRECT_URI" \-d "client_id=YOUR_CLIENT_ID" \-d "client_secret=YOUR_CLIENT_SECRET"
{
  "access_token": "ACCESS_TOKEN",
  "token_type": "Bearer",
  "expires_in": 3600,
  "refresh_token": "REFRESH_TOKEN"
}access_tokenstringToken used to call SePay APIs
token_typestringToken type, always Bearer
expires_inintegerToken validity period (in seconds)
refresh_tokenstringToken used to obtain new access token when expired
This token exchange request must be made from the server side, never from the client side because it requires using client_secret.
Step 5: Use Access Token to Call APIs
After receiving the access token, you can use it to call SePay APIs by adding it to the Authorization header:
https://my.sepay.vn/api/v1/bank-accountsAuthorization: Bearer ACCESS_TOKENHere is an example using cURL:
curl -H 'Authorization: Bearer ACCESS_TOKEN' https://my.sepay.vn/api/v1/bank-accounts
Step 6: Refresh Access Token
Access tokens are only valid for a limited time (usually 1 hour). When the access token expires, you need to use the refresh token to obtain a new token without requiring the user to authenticate again:
https://my.sepay.vn/oauth/tokenContent-Type: application/x-www-form-urlencoded
grant_type=refresh_token
refresh_token=REFRESH_TOKEN
client_id=YOUR_CLIENT_ID
client_secret=YOUR_CLIENT_SECRETParameter explanation:
curl -X POST "https://my.sepay.vn/oauth/token" \-H "Content-Type: application/x-www-form-urlencoded" \-d "grant_type=refresh_token" \-d "refresh_token=REFRESH_TOKEN" \-d "client_id=YOUR_CLIENT_ID" \-d "client_secret=YOUR_CLIENT_SECRET"
The response is similar to exchanging authorization code, including new access token, new refresh token, and expiration time.
{
  "access_token": "ACCESS_TOKEN",
  "token_type": "Bearer",
  "expires_in": 3600,
  "refresh_token": "REFRESH_TOKEN"
}You should store refresh token securely and automatically refresh token when access token is about to expire or when API returns 401 Unauthorized error.
Error Handling
When errors occur during authentication, SePay will return the corresponding error code. Below are some common errors:
| Error Code | Description | Solution |
|---|---|---|
invalid_request | Request missing required parameters or contains invalid parameters | Check all parameters in the request |
invalid_client | Client authentication failed | Check client_id and client_secret |
invalid_grant | Authorization code or refresh token is invalid or expired | Request user to authenticate again or check refresh token |
unauthorized_client | Client is not authorized to request authorization code | Check application configuration |
access_denied | User denied permission | Notify user that they need to grant permission to use the application |
unsupported_grant_type | Server does not support the requested grant type | Check grant_type parameter |
invalid_scope | Requested scope is invalid, not recognized, or exceeds registered scope | Check requested scope |
Error response format:
{
  "error": "invalid_grant",
  "error_description": "Authorization code expired"
}
Next Step
After understanding the OAuth 2.0 authentication flow, you are ready to implement it in your application. Next, learn about how to use Access Token with SePay APIs.